Best Guide of Google Assistant for PC

Google Assistant for PC: Microsoft and Amazon have collaborated to make Alexa and Cortana work together, there isn't an easy option to get Google Assistant for Windows. However, if you wish to use Google Assistant as an alternative choice to Microsoft’s default voice assistant, there's a manner in case you have a Chromebook or Windows 10 PC.
Instructions on this article apply to units operating Windows 10 or Chrome OS.
How to Get Google Assistant for PC on Windows
If your aim is simple entry to Google Assistant, your greatest guess is to buy a Google Home gadget and set it up subsequent to your computer. You may also set up the Google Assistant app (for Android or iOS) on a telephone or pill. For extra do-it-yourself expertise, purchase and construct the Google Voice Kit.
If you are decided to put in Google Assistant in your PC, you should first allow entry to Voice & Audio Activity to your Google account. You’ll additionally want a Google account and the power to put in software programs in your Windows system. To get began utilizing Google Assistant:
- Download Python for Windows and set up it in your PC.
Make certain to examine the field subsequent to Add Python 3.7 to PATH earlier than you choose to Install Now. This step important for getting Google Assistant up and operating.

Open Windows File Explorer and navigate to the primary drive listing (often C:), then choose the New Folder icon and create a brand new folder named GoogleAssistant.
Google Assistant for PC: If you don't understand through article then watch this video to understand easy and follow these steps :
Don't embrace a space within the folder identify. This might be necessary in future steps.

Google Assistant for PC: Open Google Cloud Platform in an internet browser (ideally Chrome) and choose Create Project. Sign in along with your Google account if prompted.

Enter WinGoogleAssistant as your venture identity, then write down the Project-ID beneath. When you've written down the Project-ID, choose to Create.
You will want the Project-ID later to make use of Google Assistant. Typically, the Project-ID consists of two phrases and a string of numbers separated by dashes.

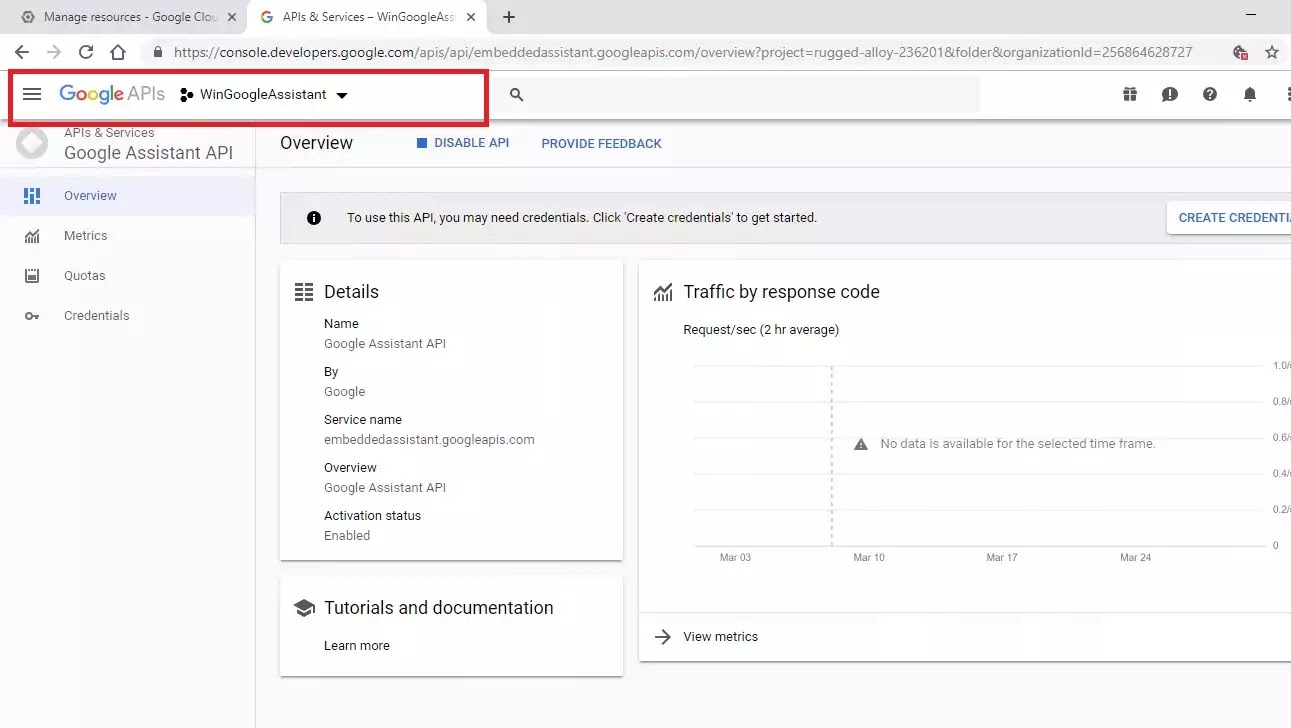
Open Google Assistant APIs in one other browser tab, then choose Enable to allow the Google Assistant API to your venture.

Google Assistant for PC: Select Create Credentials.
On the Add credentials to your venture display, select the next three responses:
- Which API are you utilizing? select Google Assistant API.
- Where will you be calling the API from? select Other UI (e.g., Windows, CLI software).
- For What knowledge will you be accessing? select User knowledge.
Google Assistant for PC: Select What credentials do I want? when completed.

Select Set up consent display.

Google Assistant for PC: Change the Application Type to Internal, sort WinGoogleAssistant within the Application identify subject, then scroll to the underside of the display and choose Save.

Select Create credentials, then choose Help me select. On the following display, choose the identical choices as you probably did in step 7 above.

Type WGAcredentials within the Name field beneath Create an OAuth 2.0 consumer ID, then choose Create OAuth consumer ID.

Select Done after the choice to download the credentials shows.

Google Assistant for PC: Select the down arrow to the precise of the credentials you simply created. It ought to show Download JSON whenever you hover over the choice. Save the JSON file within the Google Assistant folder you created in step 2.

Open the Windows Command Prompt and enter the next:
py -m pip set up google-assistant-sdk[samples]

Wait for the set up to finish, then enter:
py -m pip set up --upgrade google-auth-oauthlib[tool]

Google Assistant for PC: Open Windows File Explorer and navigate to the JSON file you saved earlier (i.e., within the Google Assistant folder you created). Right-click the file and choose Properties.

Click within the file identify subject and press Ctrl+A to pick out all, then press Ctrl+C to repeat the file identify.

Switch again to the Command Prompt window and sort:
google-oauthlib-tool --client-secrets C:\GoogleAssistant\
Then, press Ctrl+V to stick within the file identify you copied within the final step. Press the space bar, after which sort:
--scope https://www.googleapis.com/auth/assistant-sdk-prototype --save --headless
Finally, press Enter.

You’ll subsequent see a URL displayed with a immediate to Enter the authorization code. Highlight the complete URL, beginning with https://, and press Ctrl+C to repeat the URL.

Google Assistant for PC: Open a brand new browser tab and paste the copied URL into the URL subject. Select the identical Google account you used earlier to create credentials.

Choose Allow to provide the applying entry to Google Assistant.

Next, you need to see an extended string of letters and numbers. Click on the field to the precise of those to repeat the characters.

Google Assistant for PC: Switch again to the Command Prompt window, press Ctrl+V to stick the authorization code into the immediate, after which press Enter. You ought to see credentials saved message.

To take a look at that issues are working as anticipated, enter:
py -m googlesamples.assistant.grpc.audio_helpers
Your computer ought to report 5 seconds of audio and play it again to you.

Retrieve the Project-ID that you simply wrote down in step 4 (the letters and numbers that displayed whenever you created your Cloud Platform venture), then sort the next in Command Prompt window and press Enter:
cd C:\GoogleAssistant
Next, sort the next:
googlesamples-assistant-devicetool --project-id
Press the spacebar and sort your Project-ID, then press the spacebar once more and sort:
register-model --manufacturer “Assistant SDK developer” --product-name “Assistant SDK light” --type LIGHT --model “GA4W”
Finally, press Enter to complete the arrange course of.

Google Assistant for PC: To provoke the Google Assistant with push to speak capabilities, sort the command under adopted by a space and your Project-ID:
py -m googlesamples.assistant.grpc.pushtotalk --device-model-id “GA4W” --project-id

You now have a working demo of Google Assistant in your Windows system. With this configuration, after you press Enter, you may ask Google Assistant questions straight. You shouldn’t say the standard “OK, Google” command. Instead, simply press Enter whereas this system is energetic, then converse.
Google Assistant for pc does not have the entire capabilities that Cortana provides for navigating Windows, however, you may ask it nearly any query and get a solution in case you're linked to the web.
Don't lose your Project-ID as a result of you will want it every time you wish to activate Google Assistant from the Command Prompt. You can at all times go to your Google Cloud projects to view it.
Read Also
- What is Google Question Hub? Best Briefly Explained in 2020
- Best Selection “SEMrush vs Ahrefs” in 2020
- SEMrush vs Moz 2020: Which is the Best Search Engine Optimization Tool?
- What is DA & PA? How did you increase the DA & PA of the blog in 2020?
- Why Hire SEO Company or SEO Services for Online Business?
How to Use Google Assistant for Chromebook
If you've a Chromebook or Chrome OS gadget, you may allow Google Assistant.
- In the browser Omnibox, enter chrome://flags and press Enter.

Enter assistant within the search field that shows on the web page.

In the outcomes under, subsequent to both Enable Google Assistant or Enable Google Assistant with the hardware-based hot word, choose the dropdown Default after which choose Enable.

Select the Restart Now button within the decrease proper after you allow Google Assistant.

Then, go to Settings.

Scroll right down to Search and Assistant and choose Google Assistant.

Make certain the slider is ready to On.

Enable the OK Google setting to permit the system to hear for and reply to that voice command. (Adjust another choices, as desired.)

This is all about Google Assistant for PC
Post a Comment